Tuesday, 27 April 2010

Screw It

Obviously I couldn't just make a human size venus flytrap because as I have said, they work with trigger hairs on the lobes that cause the cells in the midrib to pump out ions, changing the shape of the cells allowing the lobes under tension to snap shut. It is very unlikely that I could find a way to make a half mechanical half cellular chair trap! so I will have to make do with a convention pressure pad linked to a trapping mechanism

A perfect example of such a mechanism is the classic corkscrew. It works on the simple theory that if a central column is attached to free spinning cogs, when it moves down, the cogs will turn in on themselves, the same thing happens but in reverse when the column is raised up - the cogs move outwards, I have shown these movements in these sketches -


First the arms of the corkscrew are put in the downward position and the corkscrew is positioned on top of a wine bottle. The central column has a twist piece at the end designed to screw into the bottles cork through continuous twisting of the central column. As it moves into the cork, disc like rings at even spaces further up the column move down as well, free moving cogs that are mounted at a certain distance from the column so that their teeth fit perfectly inside each of the spaces between the rings turn in on themselves, raising the arms that are attached to them

As you can see my drawing here, that this moving mechanism is very simple and affective at turning downward movement into pivoting movement

Thursday, 22 April 2010

Homing In...

It is definitely time to bring all my research together and transfer it into a design idea. As I see it I can either take the route of a material led project or a mechanism led one, each producing very different outcomes. The material one would be more about experimenting with different unusual materials to suit the form or function of the trap - for example taking Crochet further or even playing around with Polyurethane to make a rubbery silk like substance that could be manipulated to resemble a web. Whereas a mechanism led project would focus more on how performing a simple act like sitting on a chair would activate a mechanism that would result in the user becoming trapped. I think that the second route would be more interesting and much more geared towards my interests when it comes to making something

Saw

When asked by someone in our 3D stereo what I plan to make with the theme Weapon, I said a chair that when sat on the user will become trapped, the response was straight away like from the film Saw?

I actually haven't seen any of the six Saw films currently released but I gather that the main plot is that a terminally ill psychopath drugs people that are in some way don't appreciate health and life in generally, usually drug addicts or are linked to him in some way. He then takes them to a secret location where he uses mind games and torture to teach them to appreciate life while they are physically able

From looking at images and reading reviews the torture devises work using a series of mechanisms to trap the victim and them force them to risk their lives to survive, they usually involve physical harm to the victim, which isn't what I want my trap to do but I am interested in the mechanisms involved


This trap is called the Knife Chair, in the film drug addict wakes up the chair with his arms bounds to the armrests and blades jutting upwards into his forearms. To release his arms he has to push a lever level with his face. However a large apparatus is added to the chair, consisting of eight blades enclosed around his head. Jigsaw (the psychopath) then instructed him in what to do, telling him that to release himself from the chair, he had to force his face through the blades to push the lever, matching his internal ugliness by scarring his face, fortunately the chair actually collapsed as he was pushing his face through, releasing him from the trap

Looking past all the torture and cutting, this is actually a good example of where a mechanism is directly linked to what someone does in a chair - be it getting trapped or a mechanism to set you free


These are two other trapping mechanisms from the films, the reverse bear trap (left) and the head trap (right). The mechanism are very similar, the reverse bear trap is helmet that is also attached in the girls mouth, the head trap is attached to a harness that is padlocked shut. They both work by the victims having a set amount to time to retrieve the key to their traps, if they take too long the mechanisms are designed to either fly open or slam shut depending on the trap, obviously resulting in the victims death

Again very disturbing but you can see links in both to much older mechanisms I have already explored, obviously a bear trap for the left trap and a Venus Flytrap for the head trap

Despite being designed to cause intense pain and often death, the mechanisms in this the films, although very extreme are clever in why the trapping mechanism is dictated by the victims actions, which is what I hope to achieve in my mechanism

Sunday, 18 April 2010

Brit Insurance - Designs Of The Year

At the end of last week I had pretty much made up my mind for my idea and was working towards a design, this actually proved harder than I had hoped so I went to the Brit Insurance Design of the Year exhibition at the Design Museum in London to draw some more inspiration for what form my idea may take

Obviously I wasn't expecting to find lots of chairs that are traps as well but inspiration to the aesthetics, form for my piece, what materials to use or the mechanism adopted in work there. Now in its third year, the Brit Insurance Designs Awards, "the Oscars of the design world", showcase the most innovative and forward thinking designs from around the world


Straight away I was drawn towards the GINA Light Visionary Model. This innovative and eye-catching new concept vehicle was conceived when the BMW design team questioned the purpose of a car's body. Replacing the traditional rigid structure with a hi-tech fabric skin stretched over a moveable wire frame enables the car to change shape and form. Headlights are hidden - revealed by blinking apertures in the fabrics - and the shape of the rear wing can be altered to influence the aerodynamic performance in different situations. The car's interior can also be shaped to meet the requirements of individual drivers, with dials, switched and other interior elements hidden from view when not required. Despite being a one-off concept vehicle, the GINA Light Visionary Model suggests the intriguing possibility of a production car with more flexibility than had ever been seen before

Here is a link to an video of how this amazing car moves: http://www.youtube.com/watch?v=kTYiEkQYhWY

I really like how with hidden moving parts the car changes form and and to an extent the function, the function of moving at an improved speed due to the change in its aerodynamic form. This can be linked to a trap in that the true purpose of a trap is always hidden to achieve the element of surprise and will definitely change in form as the function is activated

As good as it would be to use such high-tech materials in my work, I do not think it is a possibility at this stage so I looked around the exhibition for more realistic materials

At the other end of the exhibition was the Typographic Tree, a graphic piece designed by Gordon Young. When asked by architects Penoyre and Prasard to design a site-specific work of
art for their new library in Crawley, West Sussex, he suggested a 'forest' of typographic oak columns installed floor to ceiling like supporting pillars. Fellow artist Anna Sandberg held workshops with library users, to gather information on people's favourite books, places and memories. Young then worked with typographers Why Not Associated to design columns from this user-generated content. Each of the 14 solid oak 'trees' reflects a different subject - from the opening line of the first Harry Potter book to the gothic text of Dram Stoker's Dracula. The final designs were sandblasted into green unseasoned oak by long time collaborator Russell Coleman. This material - with all its cracks and shakes - was deliberately chosen to contrast with the perfection of the new building's interior

On a previous foundation project I made a stool out of solid oak and know how malleable it is and what realistically I could achieve with this material. With wood you can sand, carve, engrave, cut, polish, vanish unlike other materials, so I would like to use some type of wood in my piece

Wednesday, 14 April 2010

Checking In

Now I have my mind set on a trapping mechanism that restrains your opponent giving you the advantage over them and have undergone a good amount of background research (so far), I feel it would be a good time to check my progress with the timescale I set out at the start of this project, shown here:

Final Major Project Timescale - 2010

Week 1

15th -19th March

Write statements

Week 2

22nd 26th March

----------

Weeks 3-4

Hand in statements 23rd March


----------------------------Easter Break 29/03 – 9/04 – Research & Development in Sketchbook

Week 5

12th – 16th April

Experiment with materials and potential designs

Decide on final idea

Week 6

19th – 23thApril

Start the manufacturing of final piece

Week 7

26th – 31st April

Finish the manufacturing of final piece

Clear Studios 30th April

Week 8

3rd – 7th May

Paint Studios

Week 9

10th – 14th May

Paint Studios

Work up 14th May

Week 10

17th – 21st May

Work up 17th May

Private View 19th May

It is Wednesday evening and I am currently working in Week 5, so according to my chart I should be Experimenting with materials and potential designs and working towards a final idea which I should start making next week. So I am slightly behind schedule but I feel happy with the background research I have done on this blog, ideas for designs shouldn't be too hard to come up with

So tomorrow, during the day (9:30am-5:00pm) I plan to start experimenting with materials and mechanisms in the workshop and in the evening set out ideas and designs...

Traps

I am now set on making a trapping mechanism for my final piece, the form of which I haven't decided on but will be the product of my previous post and some to come

I looked at how spiders catch their prey in its web, carnivorous plants that have evolved their trapping mechanisms over time due to their surroundings, explored how a caterpillar and baby feel safe when all their limbs are wrapped up and how the idea of trapping is one that carries torture and abuse

Traps have been designed and used by humans since there were humans, to an affect we owe are existence today as a race to the ability we had to catch food, when hunting was a means of survival. There are six main trap devices, these are traps that are designed to catch something and only cause harm and not to kill the victim straight out, but due to the damage caused death isn't uncommon. They are Booby trap, Animal trap, Heligoland (bird) trap, Insect trap, Man-trap and Mouse trap. For this project I think the animal, man and mouse traps are the most relevant

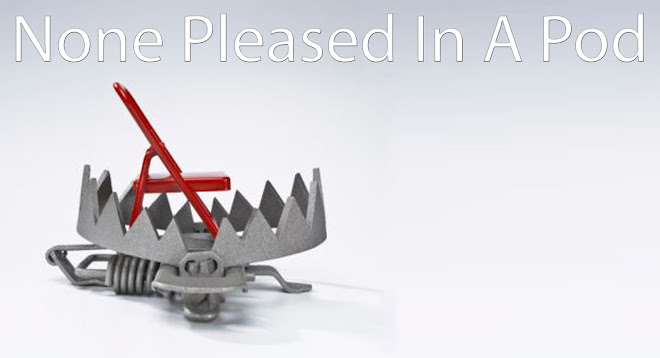
Animal traps were developed and used for hunting reasons and pest control. This form of trapping is the oldest and can be dated all the way back to 5500-22750 BC! Today most of the traps used can be easily divided into five types, foothold traps, body gripping traps, snares, cages and glue traps. Probably the most well known trap and relevant to this project is the Bear trap, an example of a foothold trap. It is made up of two jaws, one or two springs, a trigger in the middle which is usually a round pan. When the animal steps on the trigger the trap closes around the foot, preventing the animal from escaping. Usually some kind of lure is used to position the animal
Looking at this standard bear trap you can definitely see a link between how the jaws mechanism works and that of the Venus Flytrap I looked at earlier. Body gripping traps is similar to the foothold traps but is designed to kill the prey quickly

A deadfall trap is a heavy rock or log that is tilted on an angle and held up with sections of branches, with one of them that serves as a trigger. When the animal moves the trigger which may have bait on or near it, the rock or log falls, crushing the animal


Cage traps are designed to catch live animals in a cage. They are usually baited, sometimes with food bait. Cage traps usually have a trigger located in the back of the cage that causes a door to shut; some traps with two doors have a trigger in the
middle of the cage that cause both doors to shut. In either type of cage, the closure of the doors and the falling of a lock mechanism prevents the animal from escaping by locking the door shut. This has proven to be the most popular as it is seen as the most humane to the animal

Finally, probably the most used and known is the mouse trap. The classic Spring-loaded bar mousetrap was designed in 1894 and is very simple with a heavily spring-loaded bar and a trip to release it. Cheese is placed on the trip as bait, then the spring-loaded bar swings down rapidly and with great force when anything, usually a mouse, touches the trip. The design is such that the mouse's neck will be broken, or skull is crushed
Crochet-ing It Up

After looking at those baby Crocheted cocoons, thought I would give it a try. I wasn't too bothered about getting the classic spokes/spiral effect, just a piece of fabric with holes in, similar to that of a web - like this one:
I went to a knitting shop in Kingston to get the appropriate materials for my web. I very quickly discovered that there was a lot more to Crochet than I had first thought. First I had to choose the right thread, I went for 50g white to get as similar to spider web as I could. Next I had to choose the right Crochet needle, for this project I was advised to go for a relatively large needle as I was making more of a net than a dense jumper and chose a 5.0 needle


I also got a Basic Guide to Knitting and Crochet book to help we grasp the basics. Despite the clear diagrams and relevant annotation, the book very quickly proved in effective and I had to look to the internet for tutorials. I found the best place for the help I needed was on YouTube. My simply typing in How to Crochet I found a video lasting just under 7 minutes that went through how to do a simple Granny Square, after a few views I was able to achieve this first step. The next part of video went through how to make a Round on the granny square, this proved too confusing despite having the women go through it on the screen, so I left the crochet for a few days

If you are fancy I try heres the link to the first video: http://www.youtube.com/watch?v=hVBnFHGbeK4

On returning to University after our two week Easter break, I happy to find that a girl in my class called Benji had done textures prior to the foundation and knew a lot about crochet. So that afternoon Benji gave me a lesson in how to crochet


As you can see it wasn't too successful but this is the product of a first attempt, with no real experience with thread so I am quite happy with the experiment. I'm not going to completely disregard the use of crochet in my final piece but as an exercise it was very interesting